Using Tulip
Route planning and map controls
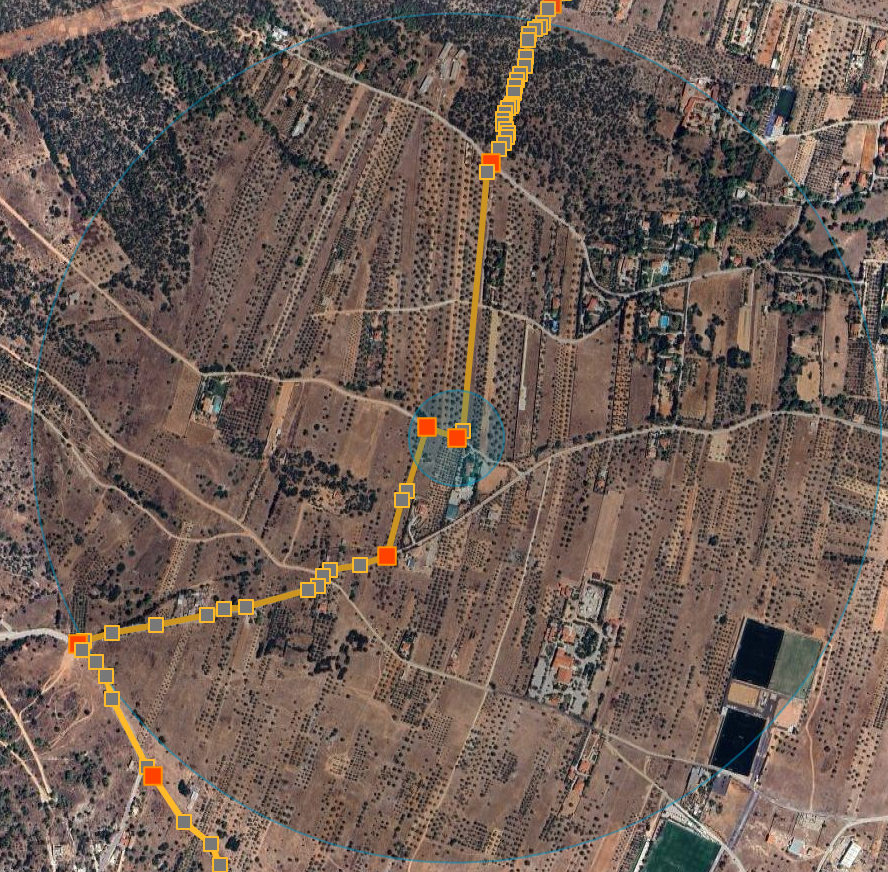
- Click on the map to add route points.
- Double click on a route point to add an instruction.
- Double click on an instruction route point to remove the instruction.
- Right click 2 times on a route point to delete it.
- To delete a range of points and any related instructions:
Right click on the first point to be deleted and then right click on the last point to be deleted
Instruction editor
The Tulip Instruction Editor is a key component of the Tulip rally roadbook editor, designed to help you create and customize instructions with precision. This interface allows you to add tracks, glyphs, Text, drawings and waypoint notes, while providing tools to modify and visualize your rally route. Below is an overview of the editor's features based on the provided image.
Double click on roadbook instruction to begin editing.
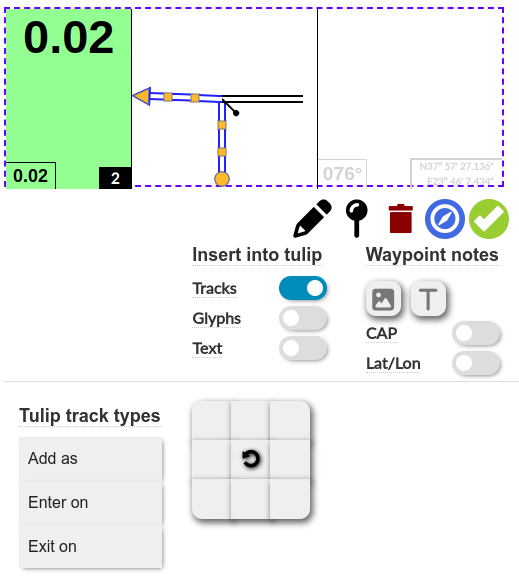
Action Icons
 Toggle drawing freehand shapes on tulip or note
 Rotate km marker by 90°
 Delete selected item from tulip or note
 Orient map with track
 Confirm changes to instruction and exit edit mode.
Tulip
Insert Tulip items
- Tracks: Toggle to enable the insertion of track elements.
- Glyphs: Toggle to enable the insertion of glyphs.
- Text: Toggle to enable the insertion of text.
Add/modify track
To add a Tulip track, first select your preferred track type from the list. Then, use the 3x3 grid of direction buttons to choose one of the 8 directional options (e.g., up, down, left, right, or diagonals) to set the track's orientation.
Tracks can be moved by selecting them and using the handles to shape and adjust their form.
To change track type, select a track and click on the new track type.
Enter on: Sets the entry track type for the current instruction. Additionally, it modifies the exit track type of the previous instruction to ensure a seamless transition.
Exit on: Sets the exit track type for the current instruction. It also modifies the enter track type of the next instruction to maintain route continuity.
Delete tracks/glyphs - Use the trash can icon or "Delete" key to delete the selected track or glyph from Tulip. Note that entry and exit tracks cannot be deleted to maintain route integrity.
Insert tulip glyphs
Toggle to enable or disable the insertion of glyphs (must be on to add glyphs). Once enabled, click on the 3x3 grid to set the glyph position. A popup with available glyphs will appear for selection. Holding the Shift key while clicking on a glyph allows for multiple insertions.
Insert text
 Toggle to enable or disable the insertion of text (must be on to add text).
Once enabled, click on the 3x3 grid to set the text initial position.
Text options are displayed on the bottom right.
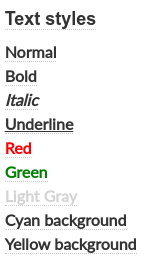
Edit text
Click on Text item, Text options appear on the bottom right. To change text click on the selected text item once again.
Drawing shapes
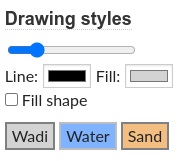 Click on the
 ![]() icon to begin drawing.
You may draw on tulip or notes.
Drawing options appear on the bottom right:
icon to begin drawing.
You may draw on tulip or notes.
Drawing options appear on the bottom right:
- Line width
- Line color
- Fill color
- Filled shape or line
- Presets for Wadi, Water and Sand
To finish drawing click on the ![]() icon
icon
Notes
- To add a glyph, use the
 button to open the glyph selection popup, where you can choose from available glyphs. Holding the Shift key while clicking on a glyph allows for multiple insertions.
 - To add text to notes use the
 button.
 - Click on text style to change the selected text item.
- To delete items from notes select item and press "Delete"
- CAP: Toggle to show or hide CAP headings in the notes.
- Lat/Lon: Toggle to show or hide latitude/longitude coordinates in the notes.
Waypoint options
When a waypoint glyph is added, Open radius and Validation radius options are displayed and also visualized on the map
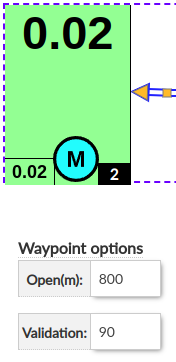
The waypoint glyph is automatically placed on the distance box.
This is valid for:
- WPM
- WPC
- WPS
- WPN
- WPP
- WPV
- WPE
- DZ/FZ
- DSS/ASS
- DN/FN
- DT/FT
For DN and DT a time option is also available
To delete a waypoint, double click on the waypoint icon
Helper tools
Speed zones autofill
There is an option to populate all speed limit glyphs within a speed zone.
The first instruction in the zone must have a speed limit.
Select the instruction and go to Edit -> Fill zone speed limit
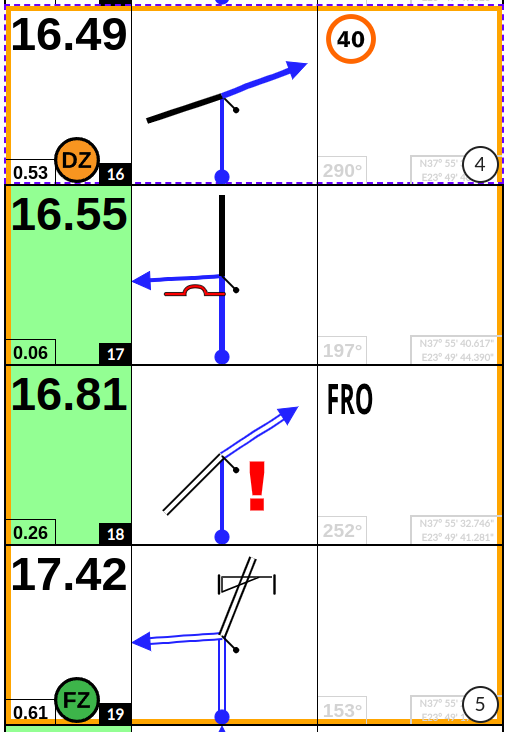
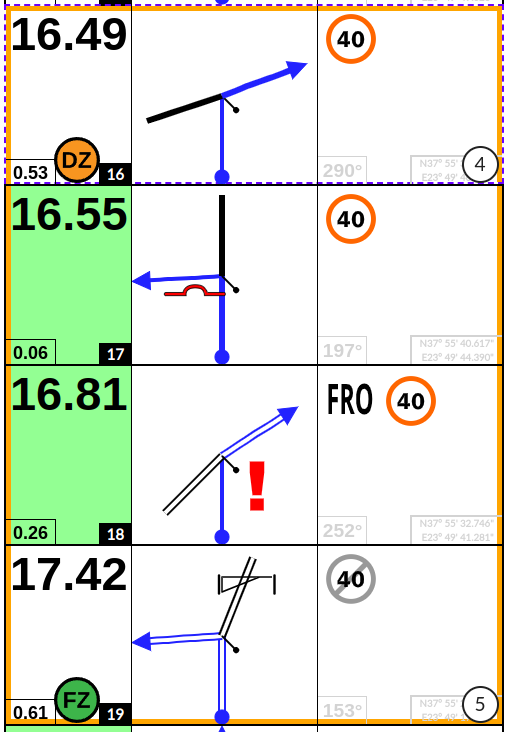
If there are multiple speed limits within a zone these limits are respected for consecutive instructions. On the speed limit change instruction a previous speed limit end glyph is added.
Last instruction (FZ,FT,FN) is populated with speed limit end glyph
If 2 zones are one exactly after another, both zones will be filled as if it was a speed limit change.
Street View
A google street view window is available under View -> Instruction street view
Click on an instruction to get street-view of that point
Rescan custom glyphs folder
Under User glyphs, clicking on the first icon triggers rescanning the user glyphs folder.
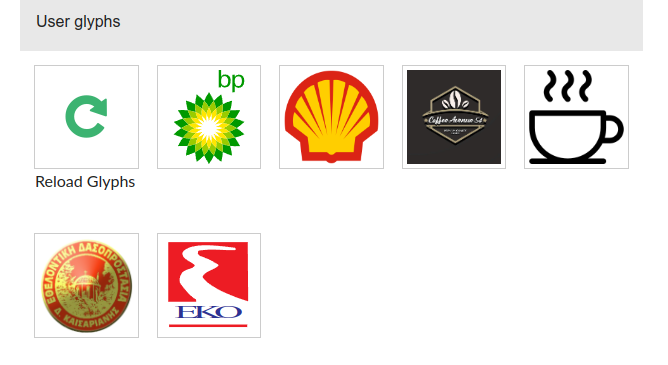
Note: User glyphs are not saved in the roadbook file.